AbuseIPDB is the gold standard for abuse reporting and is used by some of the largest hosting companies worldwide.
To enable AbuseIPDB support within the extension:
- Sign up for a free API key here. The free API key is good for up to 1000 checks per day.
- Generate an API key here.
- Enter your API key at Settings -> Network Tools Settings -> Reputation Settings -> AbuseIPDB API key.
- Check the "Block Reporting" checkbox to have the login failure daemon report failed trigger blocks back to AbuseIPDB automatically (Juggernaut Firewall extension only).
- Press the update button to save your settings.
Check an IP Address
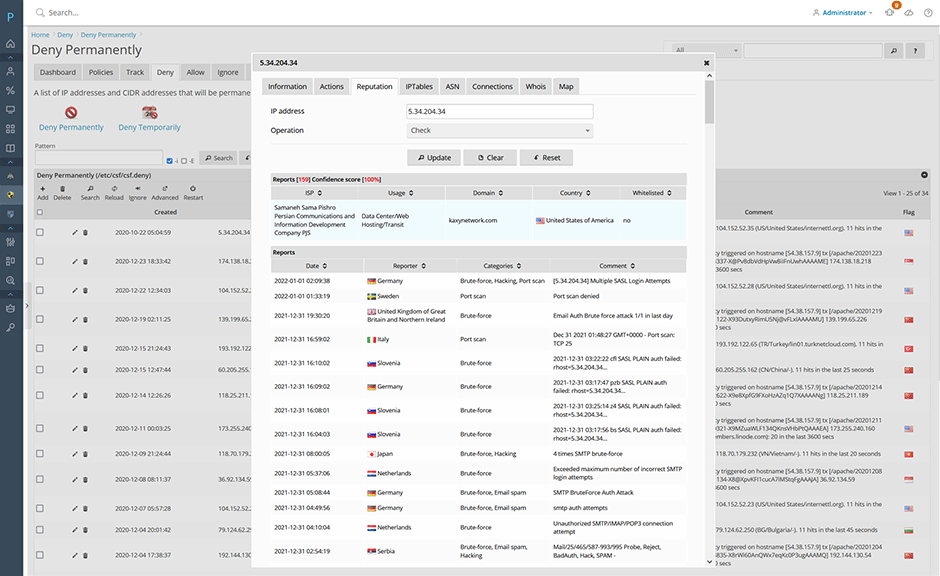
To check an IP address click on an IP address then select "Reputation".
Report an IP Address
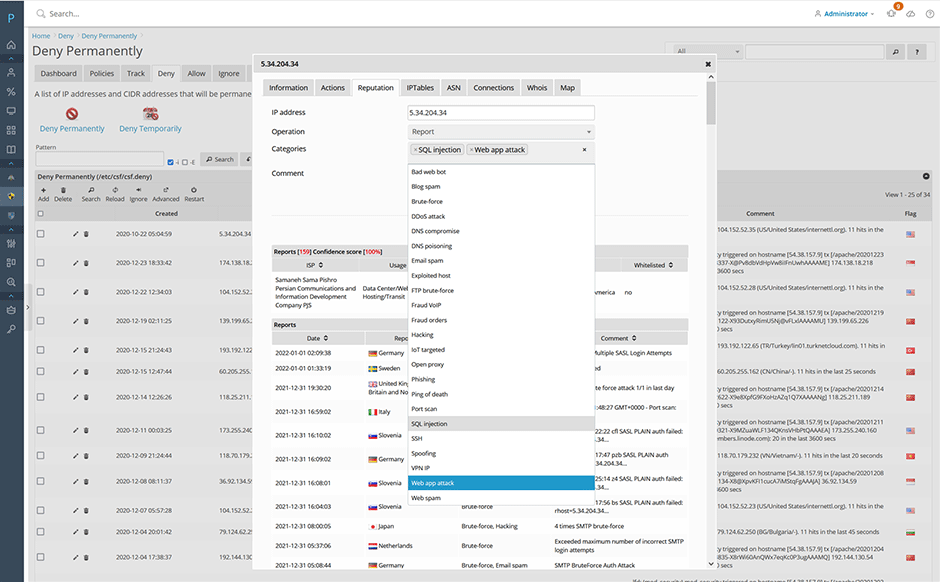
To report an IP address select "Report" from the operation select list. Then select the abuse categories you want it.
Remove a Reported IP Address
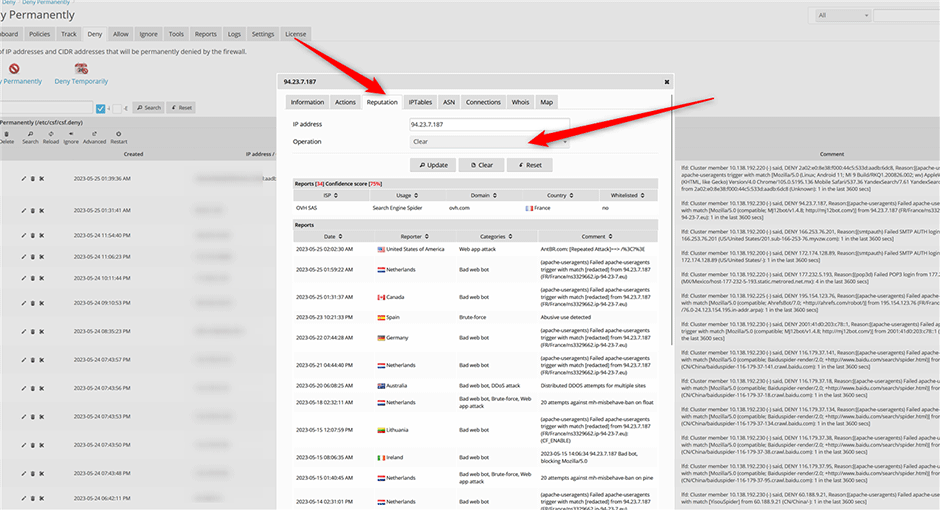
To remove a reported a IP address select "Clear" from the operation select list (You are limited to 10 clear operations per day). See here for how to remove a reported IP address from the AbuseIPDB website.
Block Reporting
If "Block Reporting" is enabled the login failure daemon will report failed triggers back to AbuseIPDB automatically. (Juggernaut Firewall extension only)
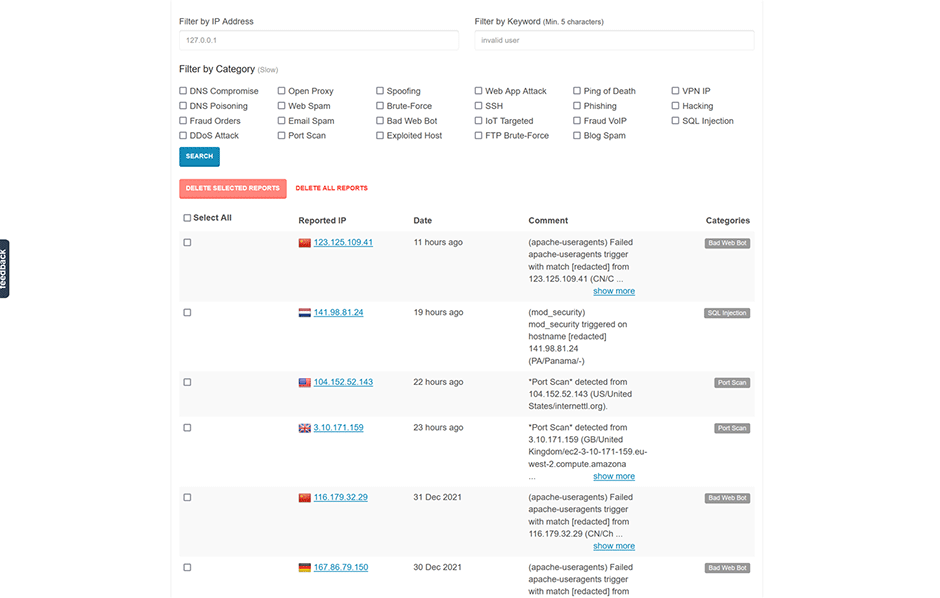
AbuseIPDB Blocklist
- Navigate to Juggernaut Firewall -> Settings -> Login Failure Daemon -> IP Block Lists
- Click the edit icon next to the AbuseIPDB block list.
- Replace YOUR_API_KEY with your API key in the source URL. Check the enabled checkbox. Then press the submit button to save the entry then press the restart button to restart the firewall and login failure daemon.
- Check the Enabled checkbox and press the submit button.
- Press the Restart button on the grid so that the login failure daemon will download the new blocklist.
// Default Source URL
https://api.abuseipdb.com/api/v2/blacklist?plaintext&limit=65000&confidenceMinimum=100&key=YOUR_API_KEY

// Replace YOUR_API_KEY with the API key that you generate
https://api.abuseipdb.com/api/v2/blacklist?plaintext&limit=65000&confidenceMinimum=100&key=db413d60408bd4cba20840285402385sdjfasjdpu09374934gsdfg99de1f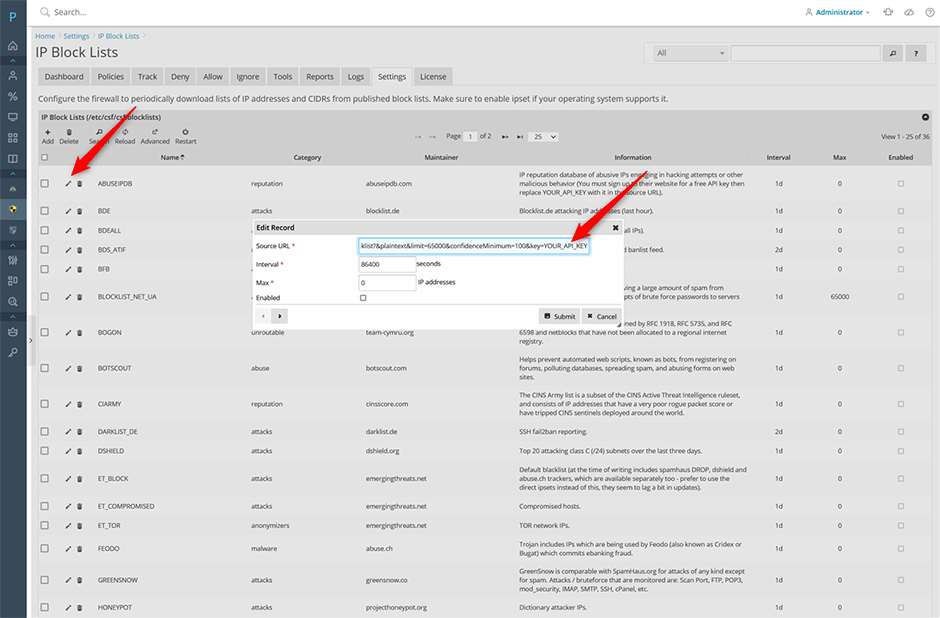
You can see the view the login failure daemon download the block list under Logs -> LDF log
2022-01-19 01:28:53 PM	5105	IPSET: switching set new_6_ABUSEIPDB to bl_6_ABUSEIPDB
2022-01-19 01:28:53 PM	5105	IPSET: loading set new_6_ABUSEIPDB with 99 entries
2022-01-19 01:28:52 PM	5105	IPSET: switching set new_ABUSEIPDB to bl_ABUSEIPDB
2022-01-19 01:28:52 PM	5105	IPSET: loading set new_ABUSEIPDB with 46914 entries
Block list entries are stored in the /var/lib/csf/ directory. Note: CSF will optimize downloaded blocklists so if another blocklist already has the same IP address then it will not be included. To view the number of entries for a blocklist on the command line:
# wc -l /var/lib/csf/csf.block.ABUSEIPDB
74140 /var/lib/csf/csf.block.ABUSEIPDB
AbuseIPDB Free vs Paid Plans
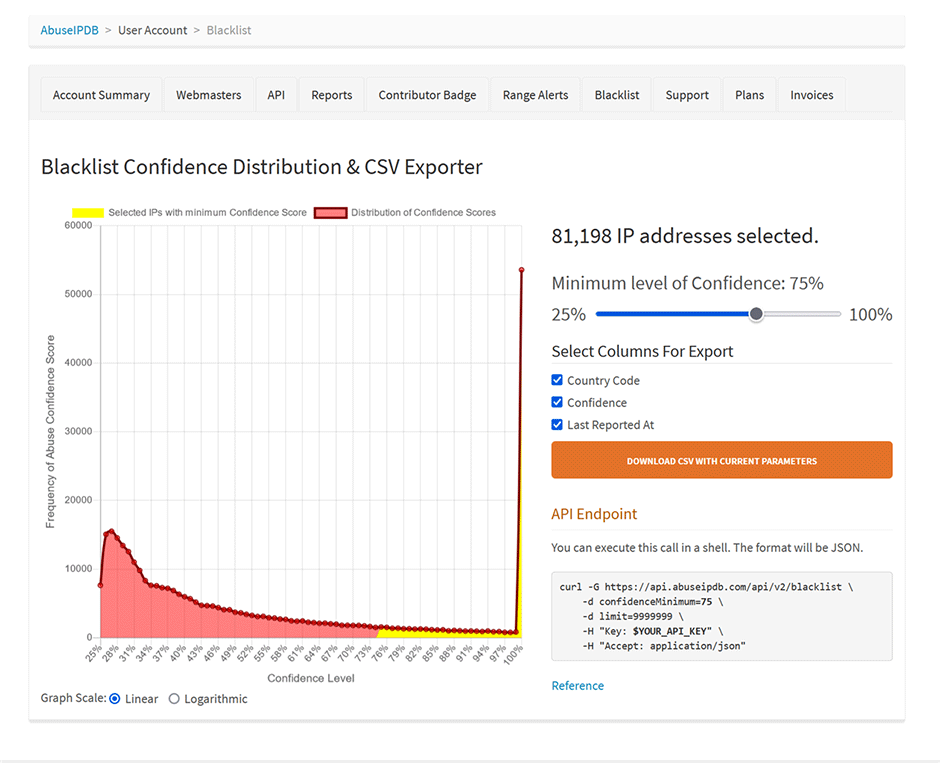
The free plan blocklist is limited to a maximum of 10,000 IP addresses. Paid users can include more IP addresses by raising the limit option and lowering the confidenceMinimum option in the source URL. Admins should first raise the Juggernaut Firewall -> Settings -> General Settings -> Ipset maxelem option larger than your limit (e.g. 100,000 - so that you don't get ipset errors loading a large blocklist of that size).
// Paid source URL example with limit set to 100,000 IP addresses and a confidenceMinimum set to 75
https://api.abuseipdb.com/api/v2/blacklist?plaintext&limit=100000&confidenceMinimum=75&key=db413d60408bd4cba20840285402385sdjfasjdpu09374934gsdfg99de1f
AbuseIPDB has a nice graph with how many IP addresses will be included at different confidence minimums here.
