Postscreen blocks connections from zombies and other spambots that are responsible for about 90% of all spam. It is implemented as a single process to make this defense as inexpensive as possible. More information about Postscreen can be found here.
Important: Before enabling Postscreen make sure that all your clients are sending using the outgoing submission port 587 or SMTPS port 465 as they will no longer be able to send mail on the incoming port 25. Enabling Postscreen will automatically enable the submission port (587) if it is not currently enabled.
Enable Postscreen (Basic Usage)
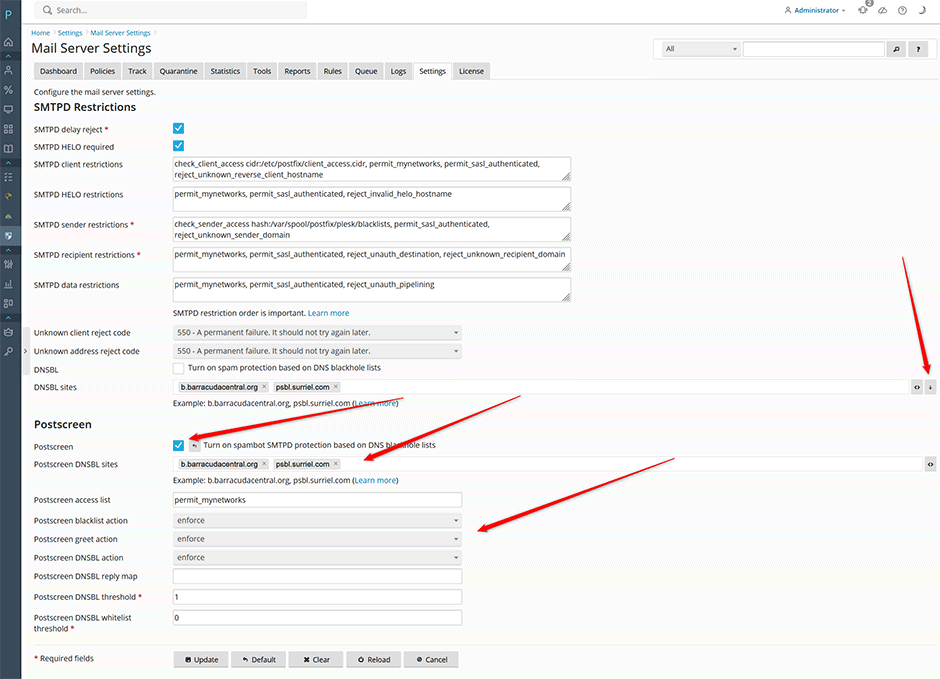
- Go to Warden -> Setting -> Mail Server Settings -> Check Postscreen
- If you were already using DNSBLs you can press the down arrow button next to DNSBL sites to transfer the DNSBLs to Postscreen DNSBL sites. Otherwise add some DNSBLs to Postscreen DNSBL sites. See here for a list of DNSBLs that we recommend. It is recommeded that the DNSBL option should be left unchecked when using Postscreen otherwise any DNSBLs would be checked twice at the Postscreen level and at the SMTP level.
- We recommend that the Postscreen blacklist action, Postscreen greet action, and Postscreen DNSBL action are all set to enforce.
- Press the Update button to apply your changes.
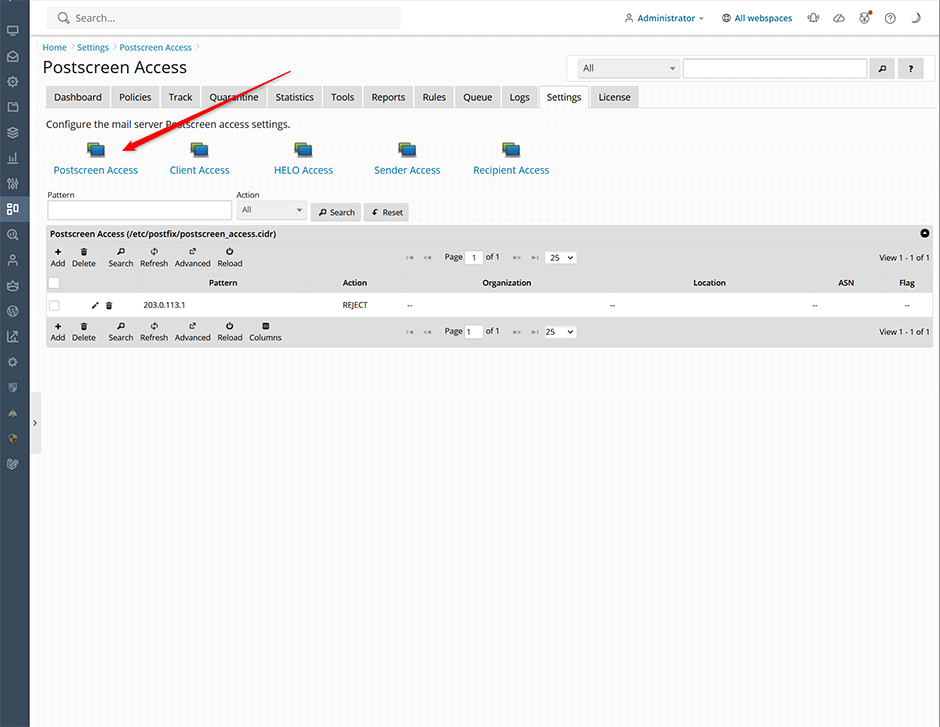
- If you have any IP address or networks that you want to whitelist from Postscreen you can add them by going to Warden -> Settings -> Mail Server Settings -> Mail Server Access -> Postscreen Access.
Postscreen Access Control
Administrators can whitelist/blacklist IP addresses or CIDRs from Postscreen by going to Warden -> Settings -> Mail Server Settings -> Mail Server Access -> Postscreen Access.
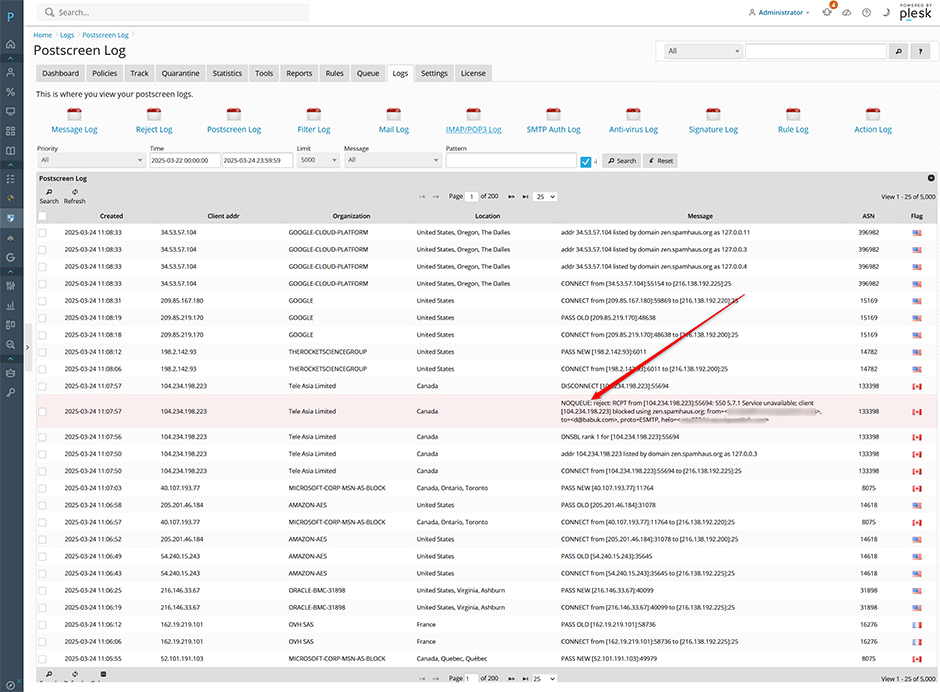
Postscreen Log
When Postscreen is enable administrators can view the Postscreen log under Warden -> Logs -> Postscreen Log. Mail clients blocked by Postscreen will be highlighted in red and begin with the NOQUEUE message.