Important: HTTP/3 support is currently an experimental feature both in nginx and Plesk. Enable it at your own discretion because it can have negative side effects (your websites may go offline).
HTTP/3 runs on QUIC, a new transport protocol. It means that, unlike HTTP/2, HTTP/3 uses the User Datagram Protocol (UDP), not the Transmission Control Protocol (TCP).
Enabling HTTP/3 Support
// check if HTTP/3 is enabled for nginx
plesk bin http3_pref --status
HTTP/3 is disabled for nginx

// enable HTTP/3 for nginx
plesk bin http3_pref --enable
HTTP/3 support was activated for nginx. Make sure your firewall allows 443/UDP [in/out].

// check if HTTP/3 is enabled for the Plesk Panel
plesk bin http3_pref --status -panel
HTTP/3 is disabled for the Plesk Panel

// enable for the Plesk Panel
plesk bin http3_pref --enable -panel
HTTP/3 support was activated for Plesk. Make sure your firewall allows 8443/UDP [in/out].
Opening the Ports On the Firewall
After enabling HTTP/3 support in Plesk you must open the UDP ports on the firewall:
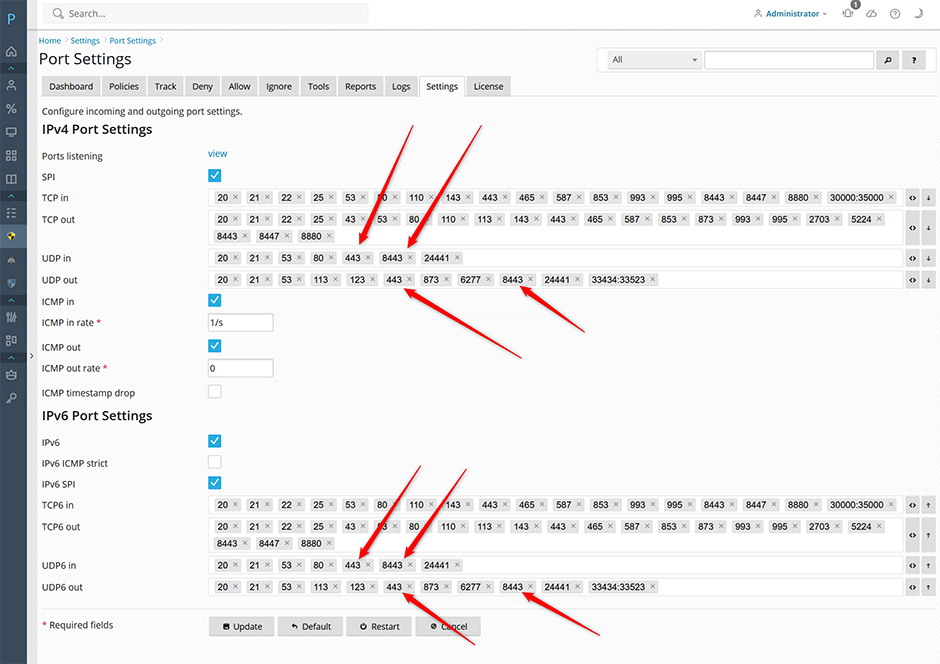
- Go to Juggernaut Firewall -> Settings -> Firewall -> Port Settings.
- Add ports 443 (for nginx) and port 8443 (for Plesk Panel) to UDP in and UDP out under IPv4 Port Settings. If using IPV6 then add ports 443 and 8443 to UDP6 in and UDP6 out under IPv6 Port Settings. Note: Juggernaut Firewall 4.04 includes these HTTP/3 UDP ports by default so after upgrading you could just press the default button on this page to open these ports.
- Press the Update button to save your settings.
- Press the Restart button to apply the changes.
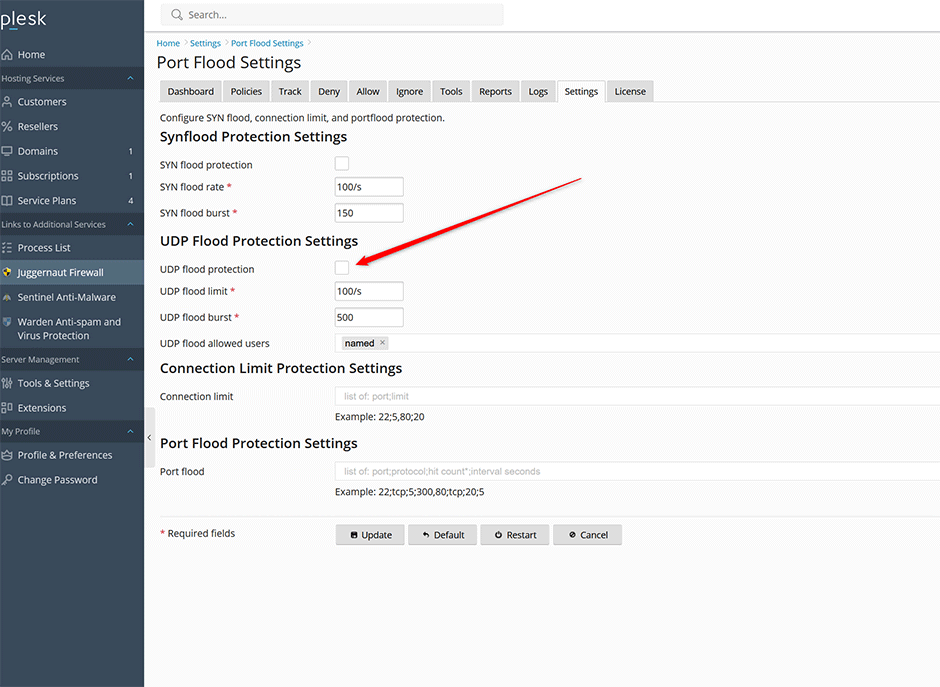
Disable UDP Flood Protection
Go to Juggernaut Firewall -> Settings -> Firewall -> Port Flood Settings make sure that UDP flood protection is unchecked (turned off).
How to Test UDP Incoming and Outgoing Connections
Although you have enabled the HTTP/3 UDP ports on your server, they may be blocked by the data center at the route/switch/firewall level. To verify this, you can run the following using the nmap-ncat command:
Install Netcat
// Centos / AlmaLinux / RockyLinux / CloudLinux
yum install netcat

// Debian / Ubuntu
apt-get install netcat
Test Incoming
To test incoming UDP connections to your server, you can run the following command from another server but not within your server to be tested.
// test for nginx
[root]# nc -v -u <your_server_ip> 443
Ncat: Version 6.40 ( http://nmap.org/ncat )
Ncat: Connected to <your_server_ip>:443

// test for the Plesk Panel
[root]# nc -v -u <your_server_ip> 8443
Ncat: Version 6.40 ( http://nmap.org/ncat )
Ncat: Connected to <your_server_ip>:8443
Test Outgoing
To test outgoing UDP connections on your server, you can run the following within your testing server:
nc -v -u www.google.com 443
Ncat: Version 6.40 ( http://nmap.org/ncat )
Ncat: Connected to 74.125.24.104:443.
